Introduction
You can use the Page “Scheduled Mailings (ADR)" to periodically send one or more documents to their respective recipients. These documents can be filtered, restricted to only certain dates and you can also exclude documents that have already been previously (either manually or any other way).
Here are some typical scenarios for this functionality:
- Automatically send all invoices of the last month to all your customers, unless they were already sent.
- Send all shipment documents to a specific location at the end of the week.
- Send a copy of all invoices and credit memos to the salespeople who are in charge of the respective customers.
This feature requires the Job Queue to be enabled and configured.
Warning
Do not confuse this functionality with the asynchronous sending mode. While they both require the job queue to be configured accordingly, they serve a very different purpose. More details on the asynchronous sending mode.Job Queue
You can let Advanced Document Reporting create the necessary job queue automatically for you. To do so, go to Setup (ADR) and the click on Job Queues. This will let you select which job queue you want to configure.
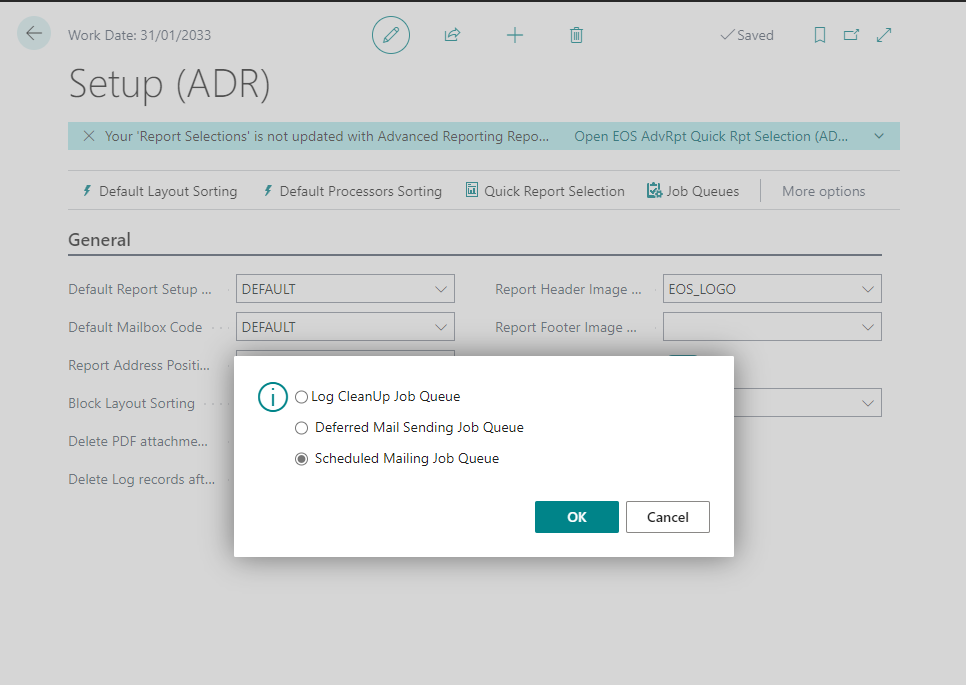
Advanced Document Reporting provides 3 differen job queues out-of-the box.
Log CleanUp JobQueue: This cleans up any ADR log entries that are older than the maximum age that has been specified in the Setup (ADR) page on the field Delete Log records after and also deletes any attachments that are older than the maximum age specified in the Setup (ADR) page on the field Delete PDF attachments after.
Deferred Mail Sending Job Queue: Whenever a user or process creates and sends an e-mail request, the user can choose to do so instantly or to put it into a queue for deferred sending. This job queue entry here is responsible for processing all the requests that were put in this queue. If you or your users plan on using deferred sending, make sure this job queue entry has been correctly configured. Read more about deferred sending.
Scheduled Mailing Job Queue: This job queue entry is responsible for processing and sending Scheduled Mailings. If you are using scheduled mailings, make sure this job queue entry has been correctly configured. Read more about Scheduled Mailings.
Setup
Scheduled mailings are available by searching for Scheduled Mailings (ADR).
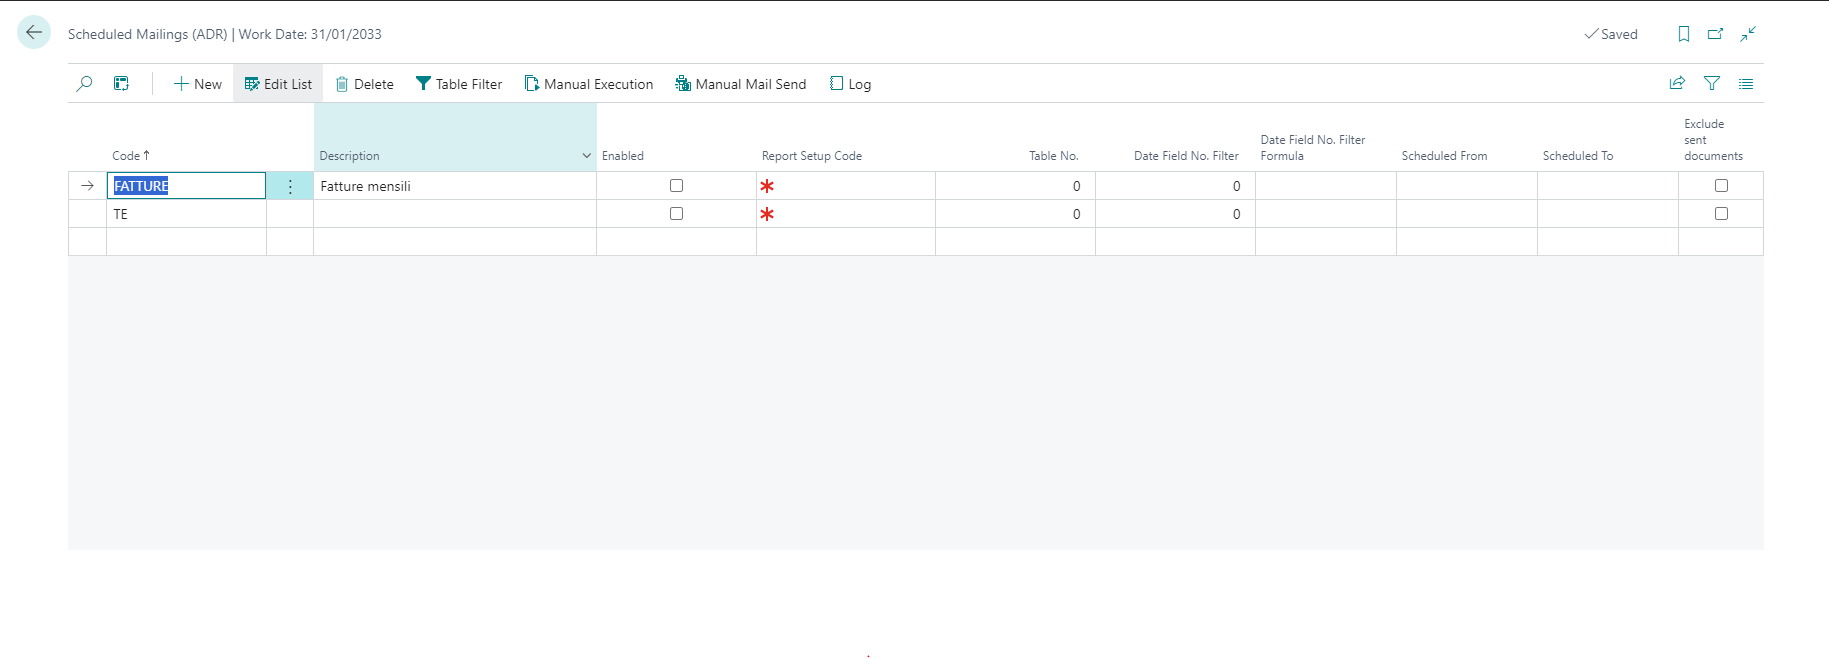
On this page you can configure all the scheduled mailings for your company.
Fields on this page
- Code: This field allows you to assign an arbitrary code to your mailing.
- Description: This field allows you to give a description to your mailing.
- Enabled: Using this flag you can enable or disable a scheduled mailing. Be advised that only mailings that are enabled are actually processed by the job queue. Also, there are some preliminary checks that ensure the mailing is correctly configured before you can enable it.
- Report Setup Code: Specifies the Report Setup Code that will be used for all documents that this mailing will generate. Remember that this will also control recipient addresses and more.
- Table No.:
Specifies the database table containing the documents you want to send. This will typically be
112for invoices,114for credit memos a.s.o. - Date Field No. Filter: Allows you to specify the field to use for filtering the date of the documents. This is optional. If you don’t specify this, all documents - regardless of date - will be sent.
- Date Field No. Filter Formula: This allows you to insert a date formula that will be used to calculate the filter that is put on the field specified by Date Field No. Filter. This date formula will be evaluated using the current date as the reference date when the mailing is executed.
- Scheduled From: If specified, indicates the start date from when this scheduling is active.
- Scheduled To: If specified, indicates the end date until when this scheduling is active.
- Exclude Sent Documents: If set, all documents that have already been sent (manually or otherwise) will not be sent again through this scheduled mailing.
Actions on this page
- Table Filter: This action allows you to specify filters on the documents to be sent.
- Manual Execution: This action will manually execute the selected scheduled mailing immediatley. The resulting request will then be opened and the user can choose to effectively send the mailing or not. This does not require the job queue to be configured.
- Manual Mail Send: This action is the same as Manual Execution, only that it will also immediately send the generated request without asking the user for confirmation.
- Log: Shows a log of past executions and it’s status.
Feedback
Was this page helpful?
Glad to hear it! Please tell us how we can improve.
Sorry to hear that. Please tell us how we can improve.