Install EOS Function API in Azure App Service
First we need to create a new AppService.
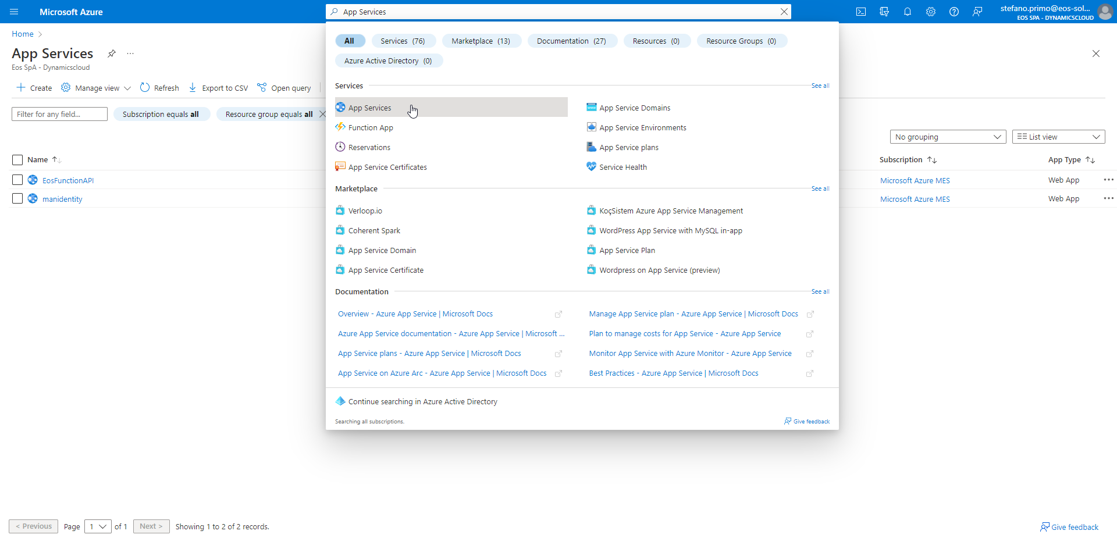
Open the azure portal (portal.azure.com) and search for “App Service”

Then click on “+ Create” to create a new app service
- Choose your Subscription and Resource Group
- Choose a Name
- Select Publish to «Code»
- Runtime Stack: .NET 6 (LTS)
- Choose your region
- Choose your service Plan
- Click Review+Create and then Create

After creating a new AppService, we need to edit some settings:
Go to Configuration (in the left menu) and create a new Application Setting:
Name : “WEBSITE_RUN_FROM_PACKAGE” Value : 1

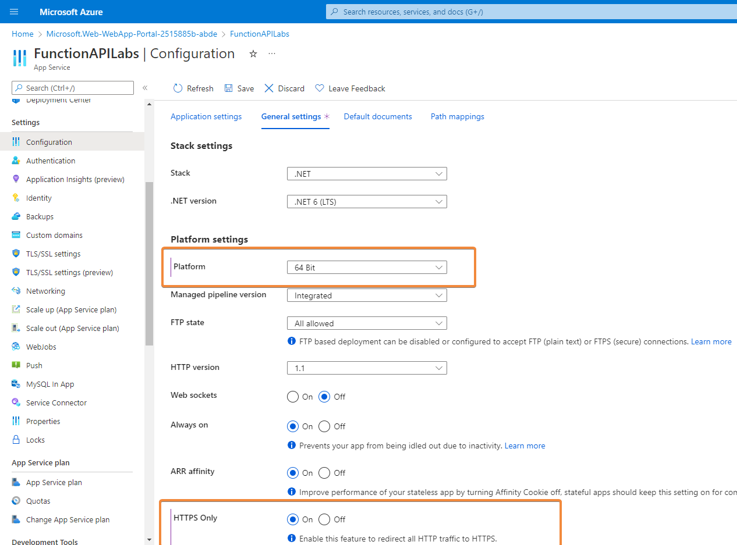
Then go to the tab “General Settings”
- Change Platform to 64bit
- Change to HTTPS Only to On

Now we can add the EOS Function API.
**Due to problems linked to AppService, you cannot use the EOS Function API Configuration Page. All the setups need to be made beforehand **
To make this process simplier, first Install the EOS Function API on your PC and Configure the desired API Keys
File System is not available on AppService
After creating the right configuration, go to the installation folder (“C:\ProgramData\Programs\EOS Solutions\eos-function-api") and copy it under a new location.
The we need to modify the file “web.config”
locate the tag “aspNetCore” and after the attribute “processPath” add a new one arguments="--console"
the tag will be like that:
<aspNetCore processPath=".\Eos.FunctionApi.exe" arguments="--console" stdoutLogEnabled="false" stdoutLogFile=".\logs\stdout" hostingModel="inprocess" />
Then you need to create a zip file containing the app (the files need to be in the root of the zip)
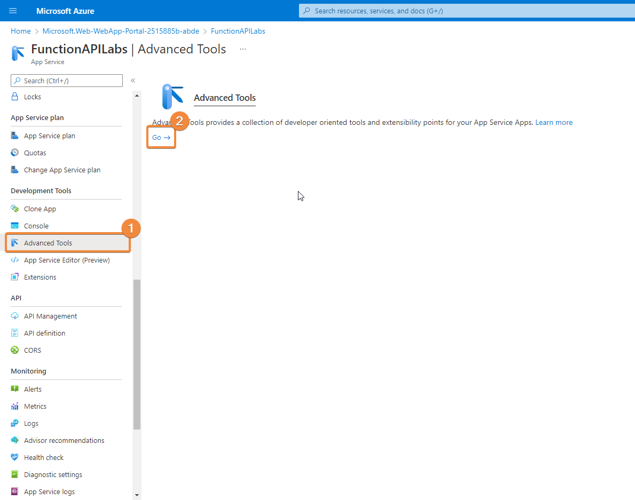
With your zip file go to Azure Portal, search for “Advanced Tools” in the left menu of the app service and click on the link “Go”.
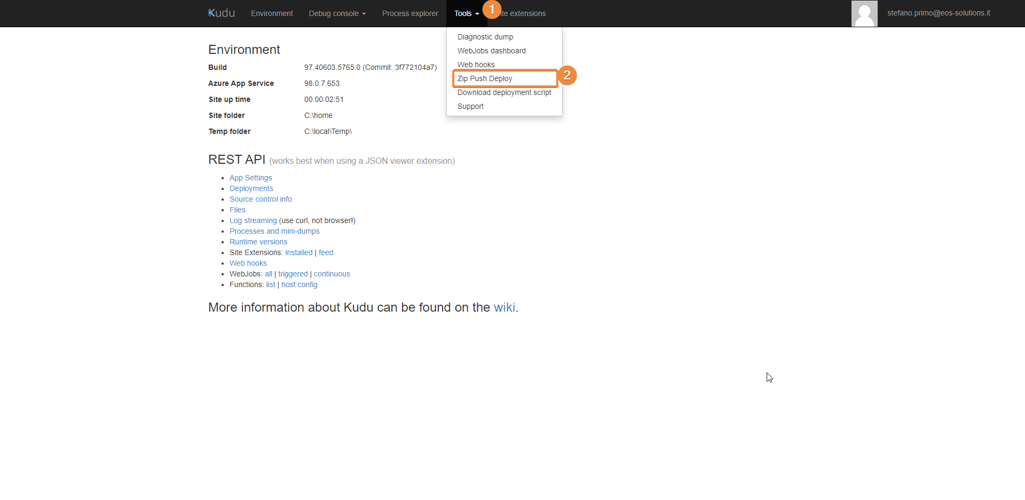
You will be redirect to another site called “Kudu”.

In Kudu, go to “Tools” and then “Zip Push Deploy”. You can now upload the zip file.

You have configured the EOS Function Api in Azure App Service
Feedback
Was this page helpful?
Glad to hear it! Please tell us how we can improve.
Sorry to hear that. Please tell us how we can improve.